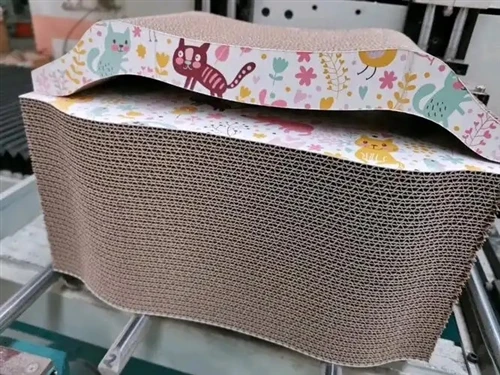
Pet furniture delivered, installed, and used by the pet-this is where many owners' focus ends. However, the first few weeks after purchase are crucial in determining the longevity of the furniture. Proper pre-use preparation, effective adaptation guidance, and timely inspection and maintenance can prevent many potential problems, allowing the product's value and performance to be fully realized.
Below is a checklist worth completing within 30 days of purchase to help you ensure your pet furniture is on the right track from day one.
Step 1: Receiving and Unpacking (Day 1)
Upon opening the package, conduct an initial quality check:
Verify Order Information-Confirm that the received product model, color, and size match the order. If the wrong item was sent, contact the seller immediately; do not begin installation without certainty.
Check for Shipping Damage-Carefully inspect all parts for damage caused during shipping: Cracks or chipped corners in the boards, scratches or stains on the fabric, and deformation or rust on metal parts. If damage is found, take photos and contact the seller immediately.
Count All Parts-Check each part against the parts list in the instruction manual. Confirm that all sheet metal, hardware, and accessories (wrenches, instructions, spare screws, etc.) are present and in good quantity. Missing even one critical screw can prevent installation; it's best to check the quantity on the day of receipt.
Read the complete instruction manual-don't start assembling based on intuition just because you see a bunch of parts. Read the manual thoroughly first to understand the overall structure and key precautions to avoid common mistakes during installation.
Step 2: Installation and Initial Inspection (Days 1-2)
Choose a suitable installation location-install near the planned final placement location to avoid needing to move it after installation. Moving it may cause loosening due to shaking and increases the risk of collision damage.
Use the correct tools-although most products come with installation tools, using your own appropriately sized wrenches and screwdrivers will often result in tighter and more precise tightening. The instruction manual usually indicates the type and size of the required tools.
Strictly follow the installation sequence-install layer by layer according to the instructions, starting with the base, then the lower layers, gradually building upwards, and finally installing the accessories. Do not skip steps, and do not substitute experience for the instructions.
Post-assembly final tightening – After all components are assembled, use a wrench to finally tighten all screws. Repeated handling during assembly may slightly loosen initially tightened screws; this final tightening is necessary to ensure stability.
Field stability test – Apply downward pressure to each platform by hand and apply lateral thrust to the top of the climbing frame to confirm the overall structure is stable and free from abnormal wobbling. This test should be completed before the pet uses the furniture to eliminate potential hazards caused by improper assembly.
Step 3: Odor Treatment and Ventilation (Days 1-7) New furniture is packaged and shipped immediately after leaving the factory, causing volatile substances to accumulate in the sealed packaging, resulting in the highest odor concentration upon opening the box. Allowing the furniture to ventilate thoroughly before use is an important step in protecting the pet's respiratory health:
Ventilation location selection – Place the assembled furniture on a balcony, in a garage, or in a room with open windows (avoiding direct sunlight and rain) to ensure air circulation. If outdoor conditions do not permit, at least place it indoors near a window.
Ventilation duration recommendation – For high-quality water-based paint or wood wax oil coatings, 2-3 days of ventilation is sufficient for noticeable odor dissipation. For solid wood products, a week of ventilation is generally sufficient to ensure safe use. If the product has a noticeable chemical odor, it is recommended to extend ventilation to 2-4 weeks. If the odor persists, consider returning the product.
Wiping Assistance – During ventilation, gently wipe all wood and metal surfaces once with a slightly damp, soft cloth, then dry. This effectively removes any residual additives and dust.
Step 4: Introducing the Pet (Days 1-14)
First Exposure (1-2 times) – Allow the pet to freely explore the new furniture under supervision. Do not force the pet to approach, jump on, or lie down; let it approach at its own pace. The initial exposure should not be too long (5-15 minutes), aiming to establish a positive impression.
Scent Guidance – If the pet shows little interest in the new furniture, gently rub a small amount of catnip or rattan on the ropes and platform of the cat tree, or place an old blanket with a familiar scent on the pet's mattress. Familiar scents can shorten the adaptation time.
Reward Reinforcement – Whenever your pet actively approaches, sniffs, or steps onto the new furniture, give it a treat, petting, or verbal praise. Positive reinforcement is more effective than any coercive method in helping your pet establish a positive association with the new furniture.
Observe Usage Patterns – Pay attention to which platform or corner your pet prefers, whether it exhibits avoidance behavior, or shows signs of over-excitement or anxiety. These observations can guide subsequent adjustments to the placement or adaptation strategies.
Gradually Increase Usage Time – Starting with 15 minutes on the first day, gradually increase the time your pet spends on the new furniture, observing whether the behavior is natural and normal. If your pet completely avoids it, you may need to adjust its position or extend the ventilation time. If your pet is overly excited (e.g., climbing vigorously on a new cat tree until panting), appropriately interrupt its activity, allow it to rest, and then continue.
Step 5: Short-Term Check and Regular Maintenance (Days 7-30)
Day 7 Tightening Check – After a week of use, the impact of your pet jumping and climbing on the newly installed furniture may have slightly loosened some screws. Without your pet present, perform a tightening check on all screws to ensure that every connection point remains stable. Day 14 Initial Cleaning Experience – Perform the first routine cleaning, removing the cat tree cover for initial washing to check its dimensional stability and fabric condition. Vacuum the cat tree surface, checking for any abnormal pilling or loose threads.
Day 30 Overall Assessment – After one month of use, conduct a comprehensive evaluation of the furniture's performance: Is the pet's usage frequency as expected? Are there any signs of loose structure or wear? Does the furniture maintain its appearance well? Are there any lingering odors? Is cleaning as convenient as expected?
If all checks are normal, it indicates a good match between the furniture and your home environment and your pet's behavior patterns. If individual issues arise, addressing them at this stage (tightening screws, adjusting positions, contacting the seller) usually won't affect the product's long-term use.
Summary
Purchasing pet furniture doesn't end when you "click to order" or "installation is complete." A complete purchase cycle is only finished when your pet truly uses it safely and comfortably, integrates into it, and enjoys it.
Receiving inspection, proper installation, adequate ventilation, gradual introduction, and regular follow-up checks-these five steps constitute a complete quality confirmation process. Each step impacts the long-term user experience of the product. Completing this inspection process within 30 days of purchase allows you to identify and resolve potential problems earlier, ensuring your pet furniture's value is fully realized.